How to Add an AI Chat Assistant to Your Website (No Coding Required)
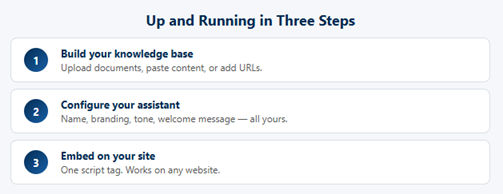
Adding an AI chat assistant to your website sounds like a job for a developer. It is not. With AIChatPlacement, the whole process is three steps: upload your documents, build the knowledge base, and paste one line into your website. This guide walks through each step, and most businesses finish in under an hour.
Before you start, it helps to know what you are building. An AI chat assistant is a small chat window that sits in the corner of your website. A visitor types a question, and the assistant answers straight away, using only the information in the documents you gave it. It does not guess, and it does not wander off onto the open internet. It works every hour of every day, so a customer who visits at midnight gets the same answer as one who visits at noon.
What you need to add AI chat to your website
You need two things: your business documents, and a few minutes with your website. There is no software to install and no code to write. If you can copy and paste one line, you can do every part of this yourself.
Step 1 — Upload your documents
Your assistant answers questions using your own business documents, so the first step is giving it something to read. Sign in to your AIChatPlacement account, open the Knowledge base tab, and upload the files your customers ask about most: price lists, service descriptions, frequently asked questions, policies, guides and manuals. PDF, Word, plain text, Markdown, CSV, PowerPoint and Excel files all work, up to 2 MB each.
A few tips for good results:
- Upload the documents that already answer real customer questions. If people ask about prices, upload the price list.
- Keep the documents current. The assistant repeats what your files say, so an outdated file gives outdated answers.
- Start small. Two or three solid documents are enough to go live, and you can add more at any time.
- Check that a PDF holds real text you can select with the mouse. A scan or a photograph of a printed page holds no readable text inside it, so the original file gives a far better assistant.
You do not need to rewrite anything or format it in a special way. The documents you already send to customers, or hand out in person, are exactly what the assistant needs. The clearer they are for a human reader, the better the assistant answers.
Step 2 — Build the knowledge base
Once the files are uploaded, press the Rebuild KB button. The system reads every document and prepares the assistant, and the status becomes Ready when it finishes. That takes a few minutes, and there is nothing to train by hand.
When it is ready, test it inside your account. Type the questions your customers actually ask and read the answers. If an answer is wrong or missing, the fix is always the same: update or add a document and press Rebuild KB again. The assistant changes only when you do this, so nothing shifts underneath you between one visitor and the next.
Spend a little time here. Ask the awkward questions, the ones customers ask at the worst moment, and see how the assistant handles them. This is the fastest way to find a gap in your documents, and filling that gap now means a smoother experience for every visitor later.
Step 3 — Add one line to your website
The Share and install tab gives you a small snippet, which is one line of code. Copy it, paste it into your website, and save. That is the entire technical part, and it is the same one line whether you run a large site or a single page.
Every website builder has a place for it. In WordPress, Wix, Squarespace or Shopify, it goes in the area where custom code is allowed. If someone else manages your website, send them the line, because pasting it takes a minute.
Refresh your website, and the chat bubble appears in the corner. Visitors click it, ask a question, and get an answer from your documents, day and night, with no one on your team typing a reply.
That bubble is the Floating Chat Widget, and it is one of three choices on the same tab. The Standalone Page is a plain web address that opens a full chat page, which you can put behind a button, send in an email or print as a QR code, with nothing added to your website at all. The Inline Chat Page places the full chat inside a page of your choosing, as a permanent section rather than a pop-up.
Make the chat match your brand
Before or after you go live, open the Appearance tab and make the chat your own. You can upload a screenshot of your website and let the colours be taken from it, or set each part by hand: the header, the picture area, the body, the welcome message, the suggested questions, the typing area and the send button. Visitors see a chat that looks like part of your website, not a separate tool bolted on.
The welcome message is worth a moment of thought. A warm first line, in your own voice, tells visitors they are in the right place and invites them to ask. The chat also shows five suggested questions as buttons, so a visitor who does not want to type can click one instead. Both are written for you when the knowledge base is built, and you can edit either whenever you like.
What if a question is not in your documents?
The assistant answers only from what your documents say. When a question falls outside them, it says so honestly instead of making up an answer. You stay in control of what it knows: update a document, build the knowledge base again, and its answers change with it.
This honesty is the point, not a weakness. A visitor who gets a straight answer of "I am not sure about that" trusts you more than one who gets a confident wrong answer. Your documents set the limits, and you move those limits whenever you add or change a file.
How long does all this take?
For most businesses, under an hour from start to finish. The upload takes a few minutes, the build takes a few more, and pasting the one line is the work of a minute. The part that rewards a little extra time is testing, because every question you catch now is one your customers never hit later.
Try it yourself
The chat bubble on this website runs on AIChatPlacement. Click it and ask anything about the service, or open the demo chat for the full-page version. When you are ready, create a free account and put your own documents to work.